I have never heard anyone not complaining about dirty grout. If you don’t know what it is, it is that little grey line full of muck between all your tiles, from the kitchen floors and walls (especially against the wall), right through your bathroom. I think the worst part is in the kitchen bellow the sink. It is just not worth looking down, so ignore it. Most people fall into the same old trap, ask the tiler to use ‘dove grey’ grout. Now in some cases that really looks good, but isn’t that just defeatism. You know, make it grey since it will go grey and be dirty, so make it look dirty all from the start and then we do not have to worry about cleaning. BS.
There are solutions to the dirty grout problem, actually there are a couple, from expensive to very easy and cheap. Let’s start with a completed old house you just moved in.

Old installed dirty grout
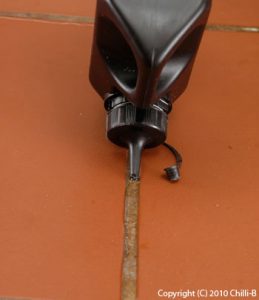
Ok this can be the worst kind. The first step is to remove the dirt and that is not a one step process (depending on how clean you want it to be). There are many products on the market, I think the most well known is ‘Grout Renu’ from TFC. Application is simple, make a small hole in the spout provided and apply the liquid onto the grout. Here is the trick, leave it for at least 15 minutes to penetrate and do its job. You might see some bubbles coming out, don’t worry, it is the acid in the Grout Renu reacting with organic compounds, so it is doing it’s job. Wash of with some water, if there is some dirt left, repeat (you know, just like with shampoo and conditioner, repeat and rinse). The chemicals will not harm ceramic or porcelain tiles, however, if you have natural stone tiles such as travertine, marble or sandstone, do not apply Grout Renu. It tends to leave a small watermark (or etch mark) on the tile where Grout Renu came in contact with the natural stone tile and reacted with existing sealants.

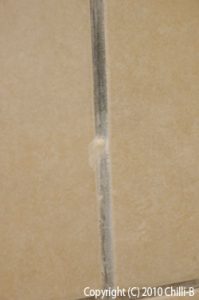
After all the effort and back ache from removing the dirt the next step would be to seal the grout so that it is easier to maintain and clean. For that we use Grout Seal. If you have natural stone tiles, the grout might have been sealed with the tiles, so in that case it might not help to apply Grout Seal. But, this is a point not many tilers know. Grout is much more porous than most natural stone tiles with the exception of local sandstone. Your will need to apply much more sealant to the grout in between natural stone tiles because of its high porosity. In most cases about three applications more would be a safe amount to go by. However, if you have ceramic (as in the pictures) or glazed tiles (ceramic or porcelain), then you will have to seal the grout not the tiles. Grout is very porous and cannot be sealed with any type of sealer. Grout Seal container looks the same as Grout Renu and the application is the same. Punch a very small hole in the tip of the spout supplied with the container and press enough liquid out so that it fills the grout line. I think it is good to apply 2-3 applications in order to ensure a good seal. Note that if the grout is smooth it will be easier to clean than rough textured grout. I think the tiler used cement mix instead of grout in the samples shown, so it did not clean perfectly the first time.

Installing new tiles
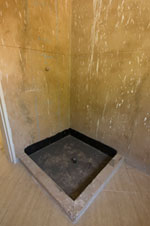
This is the easy part. In areas where there is a lot of water such as in your shower and next to the bath or around your bath, insist that the tile adhesive and grout be mixed with bonding liquid. Yes, he is right it will add to the cost, but it will reduce frustration later. The bonding liquid seals the tile adhesive and makes it waterproof. Although there should be waterproofing under the tiles in the shower, the bonding liquid is a second barrier that will reduce the risk of any water seeping through.


1 Comment
I’ve used only one application and there is a significant improvement already because the dirt accumulated for over the years and I guess the previous owners never used any grout cleaner.